Know What’s on the Shelf, Before the Repair Starts
Your system says the part is available, but the shelf tells a different story. AutoLeap’s auto parts inventory software for independent & multi-location repair shops helps them to keep inventory, ordering, and profitability connected in one place.
“AutoLeap saves me so much time. Instead of browsing multiple sites, I can order parts all in one place. Plus, the parts go straight onto the invoice automatically!”
Alyson P.Owner
“Integrated parts ordering, tracking, and customer communications make running my shop smoother and stress-free.”
Christopher S.Owner
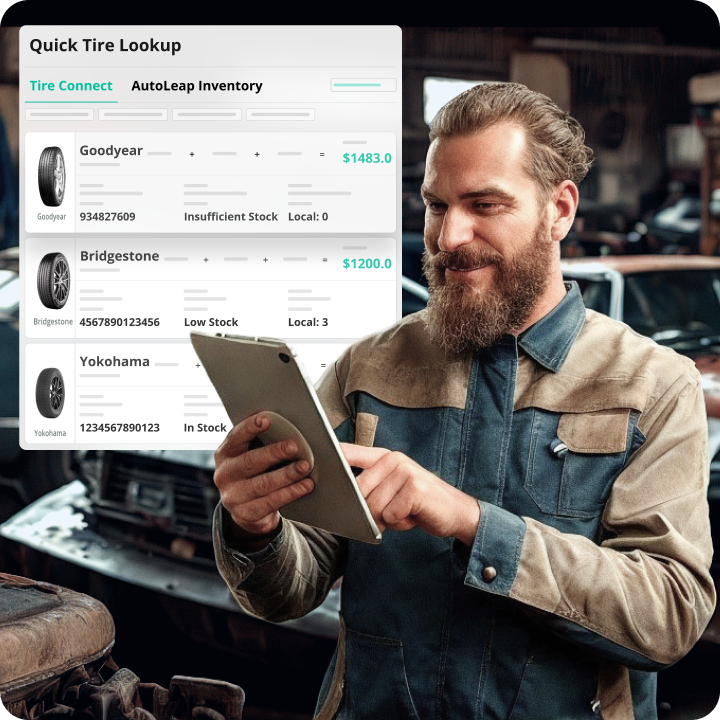
“The parts lookup is a game-changer! I can compare multiple vendors on one screen without flipping through tabs.”
Features Included With Auto Parts Inventory Management
From simplifying daily tasks to driving growth, our all-in-one powerful solution does it all.
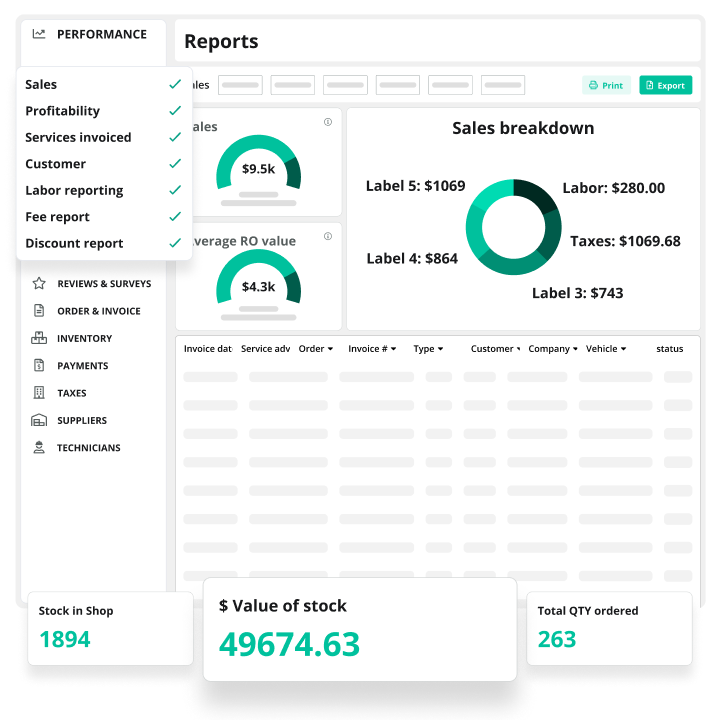
Auto parts inventory management software helps repair shops track what’s in stock, what’s on order, and what each part costs, all connected to the repair orders those parts belong to. It replaces spreadsheets, manual counts, and disconnected ordering tools with one live auto inventory management software system.
AutoLeap combines parts tracking, ordering, inventory costs, and QuickBooks syncing into the same platform as your Work Board and repair orders for independent shops and multi-location operations.
Why does my inventory show parts in stock that aren’t actually on the shelf?
This usually happens when parts are pulled without being logged, manual entries contain mistakes, or returns are never processed. Real-time tracking in car parts inventory software keeps stock counts updated automatically as parts are added and used, helping shops avoid phantom inventory and end-of-day corrections.
How do I know which parts to keep in stock at my repair shop?
Most shops keep fast-moving parts like filters, brake pads, and batteries stocked using min/max inventory levels and automatic reorder alerts. Slower-moving parts are typically ordered as needed. Usage reports and parts management software insights help shops make smarter stocking decisions based on real repair trends instead of guesswork.
How do I reduce the cash tied up in slow-moving inventory?
Start by identifying parts that haven’t moved in months. Shops often reduce excess inventory through supplier returns, promotions, or transfers between locations. Just-in-time ordering also helps prevent overstock from building up again while keeping inventory costs visible and easier to manage.
How do auto repair shops manage inventory across multiple locations?
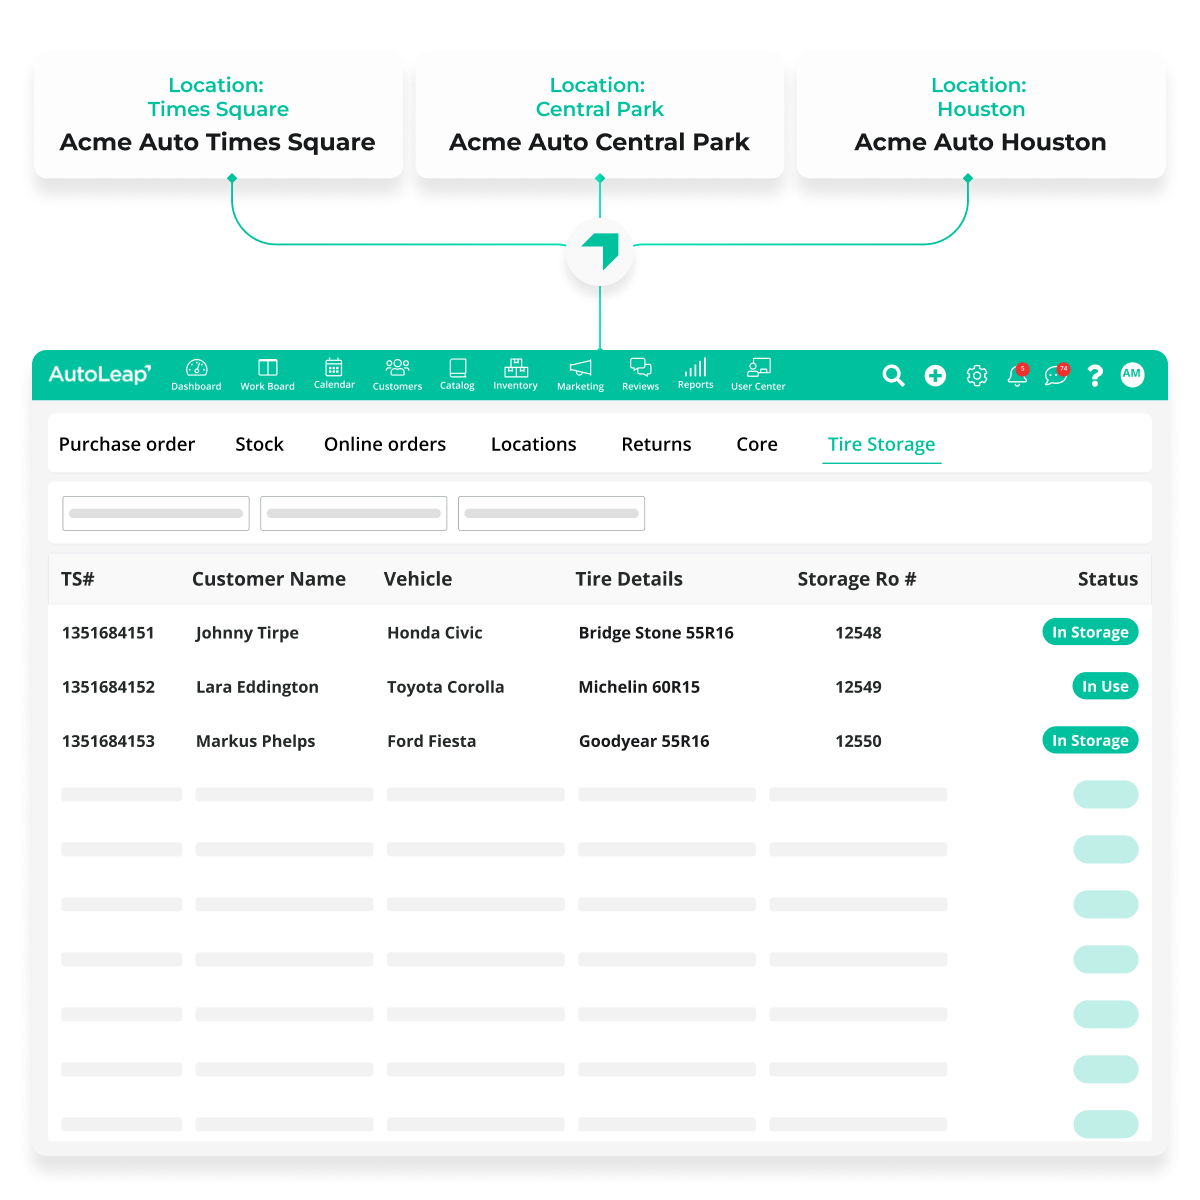
Multi-location shops need visibility into what each location has in stock to avoid duplicate orders and shortages. A centralized automotive parts inventory software platform gives owners one live view across all locations, allows direct part transfers between shops, and supports location-specific stock alerts and thresholds.
How should I price parts at my auto repair shop?
Many shops use auto parts software with built-in pricing matrices to apply consistent margins automatically across every part and repair order. This helps standardize pricing, reduce manual calculations, and protect profitability across technicians, locations, and customer invoices.
Is AutoLeap’s inventory management system suitable for a 10-bay independent repair shop?
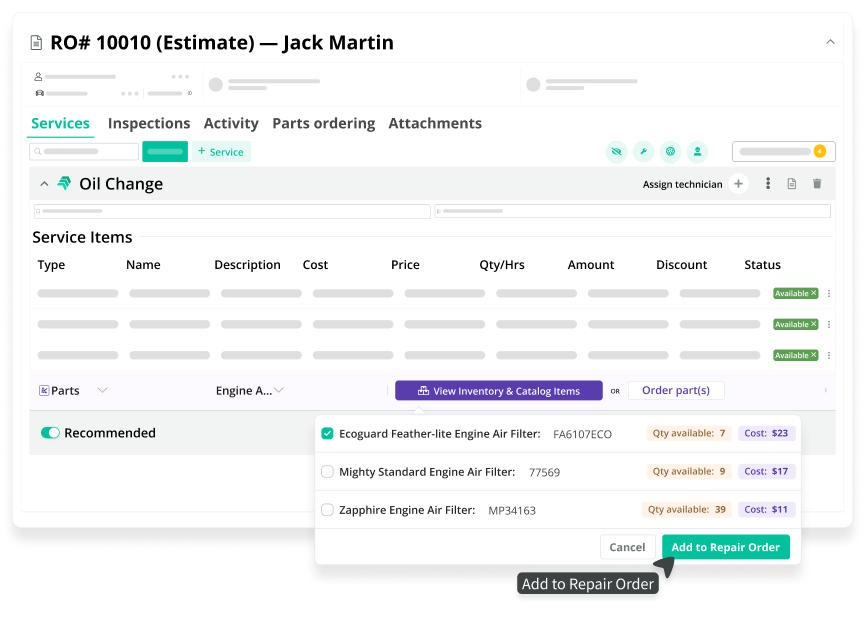
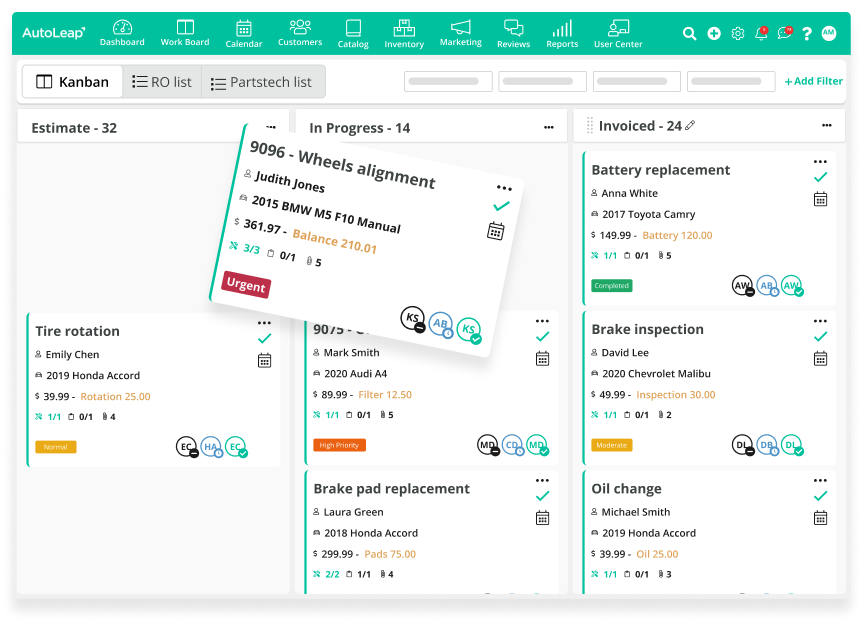
Yes, with AutoLeap shop owners can keep track of every part assigned to each vehicle in a single view.
Can I get real-time visibility into parts inventory and work orders across multiple locations with one system?
Yes. AutoLeap’s auto parts inventory management system gives full visibility of all your inventory locations under a single dashboard. You can monitor and track which part is available at what location and also check inventory reports across each location.
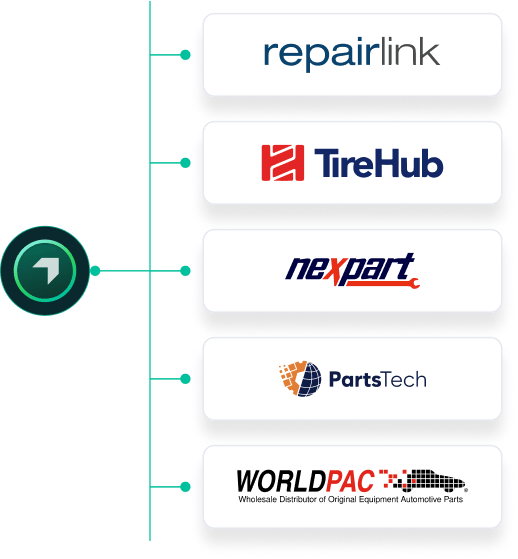
Can AutoLeap help me track specialized parts across multiple supplier relationships?
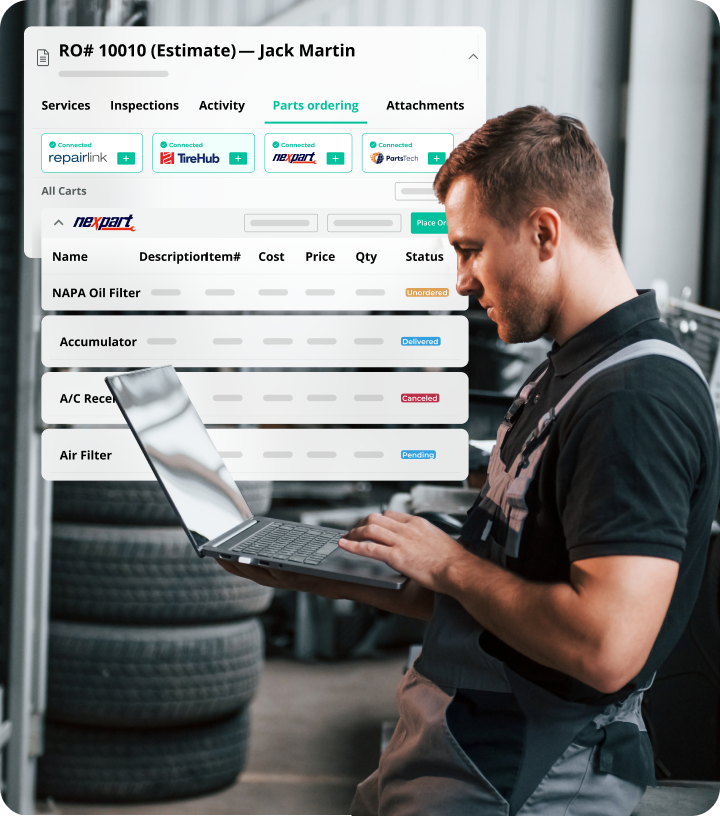
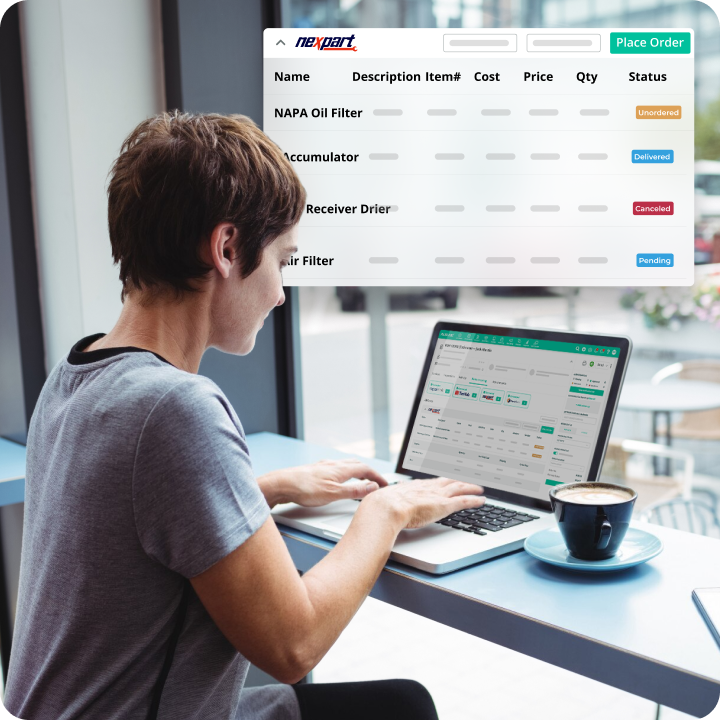
AutoLeap has partnered with reputable vendors such as PartsTech, Nexpart, TireHub, and more to order parts. You can search for and order any part, then track its status in the Workboard.
Can I track the status of my parts orders within AutoLeap?
Absolutely. Once you’ve placed an order, you can track the status of your delivery right within AutoLeap.
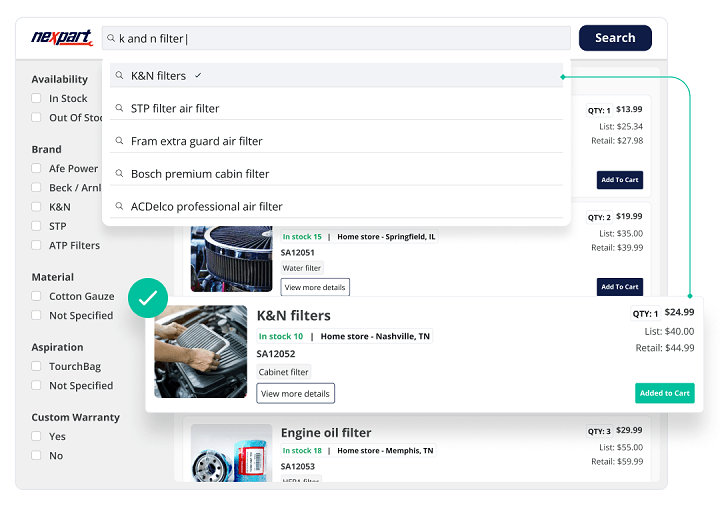
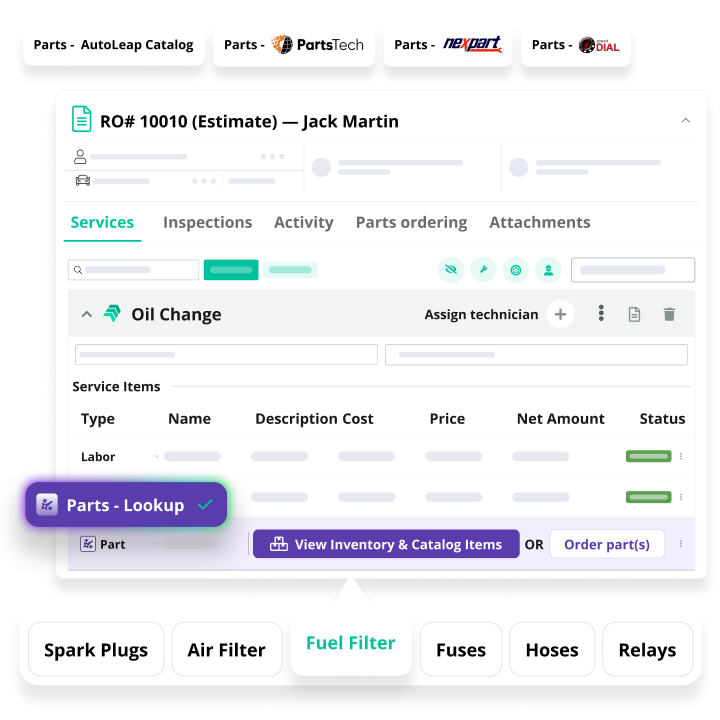
How can I search for parts in AutoLeap?
You can search for parts by part number, vehicle details (VIN), or part description to find the right options quickly.
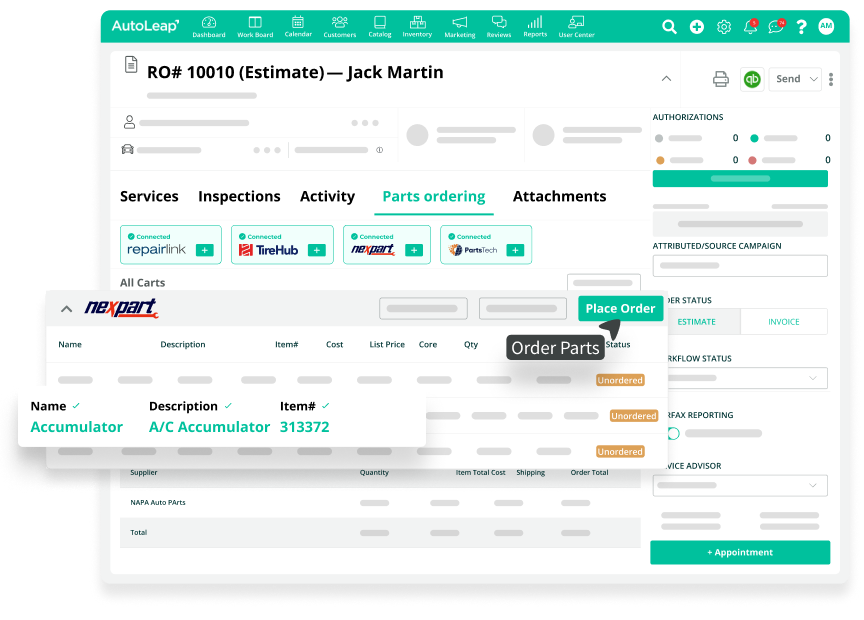
Can I order parts directly from the repair order screen?
Yes, you can add parts to your repair order or create new ones directly from the RO screen, streamlining the ordering process.
Can I store previous parts orders for easy reordering?
Yes, AutoLeap keeps a history of your parts orders, allowing you to reorder frequently used parts with ease.
Is there a way to compare prices for different parts?
AutoLeap lets you view pricing across multiple suppliers, so you can choose the best deal based on your needs.
Grow Faster with Software Built for Modern Shops
Get a free demo with the industry’s leading, award-winning auto repair software and see how it could impact your daily operations
Save 10+ hours of paperwork every week.
Experience a 30% increase in shop revenue.
Achieve a 3x increase in Google Reviews.
See AutoLeap in Action
Don’t Leave Just Yet!
Sign up and join hundreds of shop owners who are turbocharging their shop growth with AutoLeap.
 / Inventory Management