Does your technician have to walk halfway across the tire shop three times just to complete one tire swap? Then you know you have a problem. Your tire shop’s poorly planned layout doesn’t just slow things down. It is leaving money on the table for your business every single day. Optimized shop layouts can improve technician throughput by 15-25% just by reducing wasted movement and eliminating bottlenecks between workstations.
The good news is that you don’t have to go through any major renovations. You also don’t need a huge budget. This just requires a little rearranging in your shop.
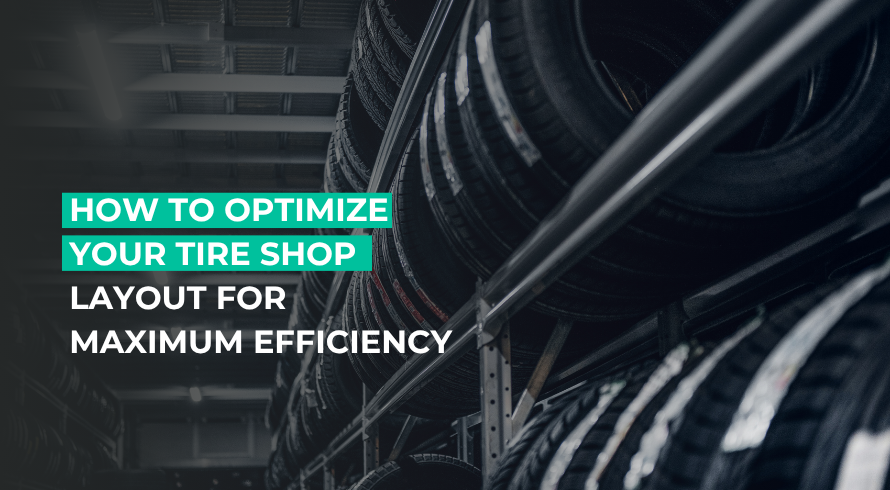
This guide is for tire shop owners and managers seeking practical advice on optimizing tire shop layout for maximum efficiency. Let’s get straight into it.
How to structure your service bays for rapid turnaround
The service bay is the heart of your operation. This is where the real action happens. How this space is organized determines everything. Right from how long the job takes to even how many vehicles you can realistically push through in a day.
Keep your diagnostic stations near the entry points
One common mistake we see tire shops make is burying diagnostic stations deep in the shop. When a vehicle comes in, the technician has to walk past 3 other bays and around a pile of tires just to plug in a scanner. Diagnostic stations should be placed near the front. That is where the vehicles enter.
So why do we say a front-positioned diagnostic station is preferable? Here’s why:
- Vehicles are sorted at the door and taken directly to the right bay without double-handling.
- Techs don’t waste time repositioning cars across the floor.
- The main work area remains clutter-free (no vehicles waiting to be assessed).
- The waiting area will be quieter and more organized for customers.
On the surface, you might think it just saves 10-15 minutes. But those minutes you save per vehicle add up fast when you’re working with six or eight cars on a busy Saturday.
Group together tire changing and balancing machines
This might seem like an obvious one. But you’d be surprised at how many times we have seen shops with a tire changer on one end of the bay and their balancing machines 12 feet away. Every unnecessary step your technician takes is wasted time. Wasted time is wasted money.
How do you fix that? Keep your balancer right next to your tire changer. It should ideally be within two to three steps. When your tech dismounts a tire and needs to balance a new one, they should barely have to turn around. That tight cluster of equipment, changer, balancer, and a small parts cart, makes a complete tire service station that keeps one tech fully productive in one spot.
Avoid mixing quick-lube bays with heavy tire repair zones. These are different workflows, and when they share space, both suffer:
- Quick lube jobs get delayed because a tire swap is blocking movement.
- Tire techs get interrupted by oil change traffic.
- Equipment and supplies for both services end up crowding each other out.
Keep these areas separate when your footprint allows it.
Tire shop layout according to shop size
Before you go ahead and start moving equipment, map out what your shop layout should look like based on your square footage. Here are three scenarios that can give you a useful starting point.
Square Footage | Bays | Additional Notes |
~2000 sq ft | 2 bays + shared equipment station |
|
~3500 sq ft | 3-4 bays + dedicated tire section |
|
~5000 sq ft | Separate workflows, defined traffic lanes |
|
Implement smart tire inventory storage
Your service bays won’t run efficiently if your storage area is a disaster. Inventory management doesn’t seem urgent until it starts costing you real money.
Get vertical racks to reclaim floor space
Is your tire shop stacking tires horizontally on the floor? That means you’re using more square footage than you need to. Vertical tire racking, where tires stand upright in organized columns, takes the same inventory and shrinks its footprint. If you have a smaller tire shop, this gives you more tire space.
Regardless of the square footage benefit, vertical racks are safer and more practical:
- Horizontal stacks tip and shift, which creates a physical hazard.
- Digging through a floor pile to find the right tire size wastes time and beats up your team.
- Vertical storage lets your tech check the rack at a glance and pull cleanly without moving other tires.
Set up a first-in, first-out rotation flow
FIFO (first-in-first-out) is a warehouse concept. It also works in a tire shop. Tires that are sitting around for too long can degrade. And if your oldest stock keeps getting ignored for newer inventory, you will end up writing off product you already paid for.
The setup is simple:
- Load the new inventory from the back of the rack
- Pull the stock from the front
- Label the sections by tire season and season to remove guesswork
So when a tech needs a 225/65R17, they will know exactly which section to go and pull from the front without thinking twice. Older tires in the hard-to-reach corners is one of the slow, invisible losses that shop owners don’t often notice until a full inventory audit. A good rack design will stop this before it even starts.
Key structural building considerations
If you’re building a new tire shop or have major renovations coming up, the structural decisions you make now will enhance efficiency or create massive headaches you will have to work around. Get this part right.
Quick specs
Before we go into details, here are a few key numbers every shop owner should know when planning or building a major renovation for their tire shop.
Specifications | Recommended Minimum |
Bay Width | 12-14 feet per bay |
Ceiling height | 14-16 feet (for most 2-post lifts) |
Drive lane width | 20-24 feet |
Bay door width | 12-14 feet |
Bay door height | 12-14 feet |
12 feet minimum |
Select a clear-span floor plan
A clear-span building is one that doesn’t have any interior support columns. For a tire shop, this is the best choice. Columns create permanent obstacles that dictate where lifts go, where vehicles park, and how traffic moves through the space. Every time you want to rearrange or upgrade those columns, they stand in the way.
With a clear-span design, you will have:
- Full flexibility to keep bays wherever your workflow demands.
- The ability to shift equipment or add lifts without structural constraints.
- Smooth vehicle movement in and out during peak hours with awkward maneuvering.
- A layout you can reconfigure when your business grows.
Ceiling height and lift clearance
Ceiling height catches shops off guard. A 2-post lift needs a minimum of 12 feet of clearance. Recommended ceiling height is 14 to 16 feet to factor in the lift structure, safety clearance, and the ability to work comfortably. If your tire shop works with larger trucks or commercial vehicles, push that to 16 feet or higher.
Size the bay doors for modern vehicles
Undersized bay doors are a major operational problem that older shops deal with. Modern trucks and SUVs make up an enormous share of vehicles on the road. These vehicles are taller and wider than the vehicles from 20-30 years ago. A bay door that would have been enough in 1995 is tight for today’s F-150s and Suburbans.
But the door is only part of the equation. Most shop owners don’t account for the turn radius needed to get a vehicle into a bay. The drive lane needs to be wide enough for a full-size truck to turn in without much maneuvering. It’s recommended to have a 20-24 foot drive lane to prevent accidents.
For new shops, here are a few benchmarks to keep in mind:
- Standard bay doors: at least 12-14 feet wide and 12-14 feet tall.
- Commercial vehicles, lifted trucks, or full-size vans: size up beyond those numbers.
- Lift floor requirements: your concrete slab must be thick enough to support both the lift and the vehicle. This is a code requirement in most jurisdictions and a safety requirement everywhere.
The cost difference between a correctly sized door and one that is a few inches shorter is small compared to the frustration caused by a door that barely clears.
Optimize layouts for limited square footage
We know not everyone can have a 10,000 square-foot facility. Most independent shop owners are working with 2,000 to 4,000 square feet. Sometimes, even less than that. But you can still plan carefully to make the most of it.
Use mobile equipment carts
Don’t have permanent fixtures. These are the enemies of a small shop. Every tool cabinet, workbench, or equipment stand bolted to the floor or too heavy to move is a permanent to a specific workflow. When you have limited space, inflexibility is costly.
Mobile tool carts and rolling equipment stands change that:
- Your technicians can pull their cart to the vehicle, do the job, and roll it back when done
- If a larger vehicle needs more space, the cart can be moved instead of the car
- Two techs can each work with their own cart on adjacent jobs without crowding each other out.
- You can easily clear the floor at the end of the day or reconfigure it for a different job type.
Consolidate multi-purpose workbenches
In a bigger shop, there is a dedicated bench for electrical work, another for small parts, and another bench for fluid service. But in a small shop, one bench needs to do multiple jobs. That’s okay. But most shop owners make the mistake of filling every inch of the workbench with permanent fixtures and gear that rarely get used.
A few easy ways to keep your workbenches functional without clutter:
- A wall-mounted tool organizer and pegboards move storage off the surface and onto the wall
- Sliding drawer systems let you store more without spreading out horizontally
- If a piece of equipment hasn’t been touched in a week, remove it. It doesn’t belong on the bench.
Wrapping up
One thing we will say is that if you’ve been running a small shop that feels chaotic and stressful. Most often, the culprit is the layout, not the size. You can have a very well-organized 2,500-square-foot shop that can run more smoothly than a disorganized 5,000-square-foot one. With careful spatial planning, you can take away half the stress. Not because the work gets easier, but because your techs stop fighting the space.
FAQs
How do I lay out a small tire shop?
Lay out a small tire shop by going vertical with your storage and mobile with your equipment. Avoid permanent fixtures wherever possible, keep your tire changing and balancing equipment grouped, and make sure your traffic flow is clearly defined and doesn’t require crossing or backtracking.
What is the best building structure for an auto repair shop?
The best building structure for an auto repair shop is clear-span construction. It is preferred because it gives you a fully open floor without interior columns. This allows maximum flexibility for positioning bays, lifts, and equipment, and makes future reconfiguration much easier.
How can I improve my shop's customer waiting area?
Keep it physically separated from the service area for safety and noise reasons. Good lighting, comfortable seating, and visibility into the shop (through a window, not an open door) can go a long way. Customers feel better about waiting when they can see their vehicle.
How should I organize my tire inventory?
Use vertical racking organized by size and season. Set up a first-in, first-out pull system so older stock gets used before newer inventory. Label everything clearly so retrieval is fast and accurate.
Does an ergonomic shop setup increase productivity?
Ergonomic shop setup increases productivity consistently. When techs aren’t walking unnecessary distances, searching for tools, or working around cluttered spaces, they complete jobs faster and with less physical fatigue.
How should I organize my tire inventory?
Use vertical racking organized by size and season. Set up a first-in, first-out pull system so older stock gets used before newer inventory. Label everything clearly so retrieval is fast and accurate.